文章目录
- 前言
- 一、环境准备
- 二、实验过程
-
- 1、素材准备
- 2、人体骨骼关键点检测
-
- 2.1、具体代码
- 2.2、实现效果
- 3、将动作映射到皮影戏中
-
- 3.1、具体代码
- 3.2、实现效果
- 4、将视频中的动作映射为皮影戏,合成视频
-
- 4.1、具体代码
- 4.2、实现效果
- 5、视频效果展示
- 总结
前言
通过PaddleHub完成人体骨骼关键点检测,将人体骨骼关键点进行连接,获取到人体的肢体骨骼,在骨骼肢体上覆盖皮影素材,得到皮影人了。最后将视频中连续帧进行转换,就可以实现“皮影戏”的效果了。
提示:以下是本篇文章正文内容,下面案例可供参考
一、环境准备
以下是我所使用的环境
| 软件 & 环境 |
|---|
| Python 3.7.0 |
| PyCharm 2019.3.3 |
首先我们需要通过pip安装PaddlePaddle和PaddleHub
完成后,通过PaddleHub来安装人体骨骼关键点检测模型 human_pose_estimation_resnet50_mpii
参考文章:
AI 实现皮影戏,传承正在消失的艺术:https://aistudio.baidu.com/aistudio/projectdetail/764130romQRCode=1&shared=1
二、实验过程
1、素材准备
首先,创建以下文件夹
| 文件夹 | 用途 |
|---|---|
| work/imgs | 存放图片资源 |
| work/output_pose | 存放人体骨骼关键点识别后的图片 |
| work/mp4_img | 存放视频按帧导出的图片 |
| work/mp4_img_analysis | 存放视频图片映射为皮影戏的结果 |
| work/shadow_play_material | 存放皮影的素材图片 |
shadow_play_material 中的图片素材可以通过上述链接的 “文件” -“work/shadow_play_material” 中获取,该素材是合成皮影形象的关键素材,不能缺少。
与此同时,也要把在 “work” 中的皮影背景图 “background.jpg” 下载下来,该素材是合成皮影图像的关键素材,不能缺少。
2、人体骨骼关键点检测
将图片资源放到 “work/imgs” 中,检测后,会生成相应文件在存放在 “work/output_pose” 中
2.1、具体代码
2.2、实现效果
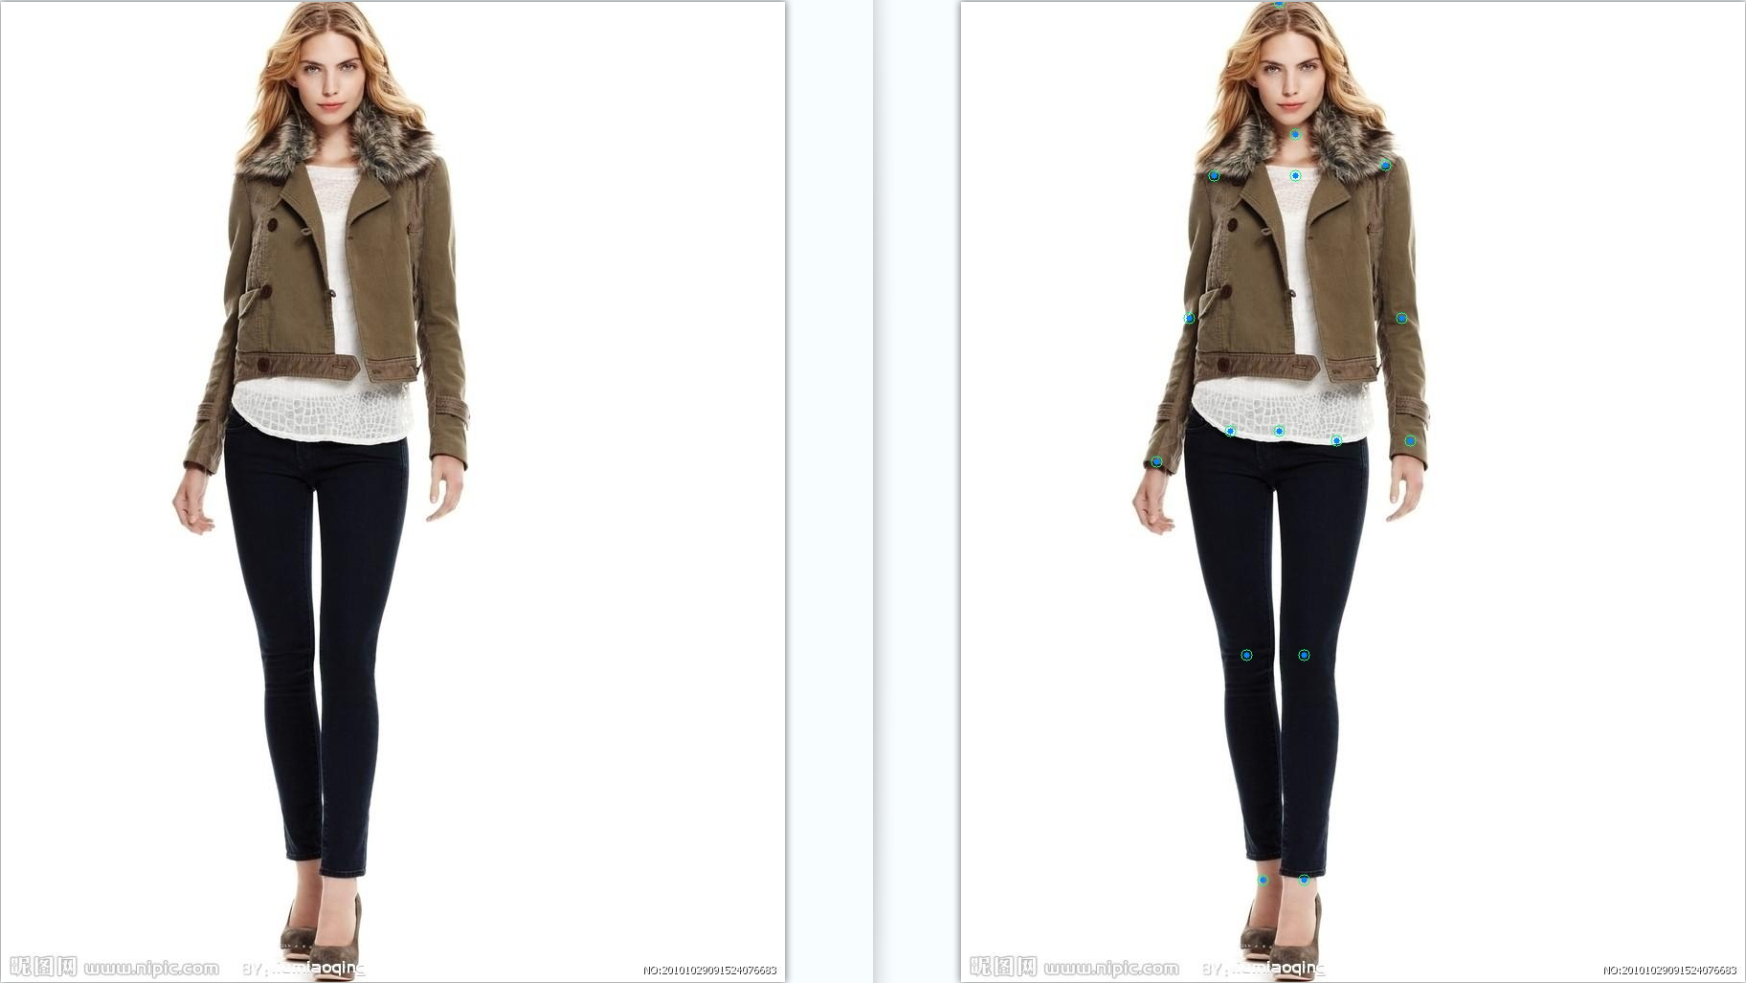
将提取前后的图片进行对比,可以看到右图中人体骨骼关键点已经检测并标记出来了

3、将动作映射到皮影戏中
要实现皮影戏的效果我们首先要解析,人体各个骨骼关键点的位置信息,通过关节点的信息计算皮影的肢体位置,和旋转方向,从而达到肢体同步。
通过2个骨骼关键点可以确认肢体的长度和旋转角度,根据长度就可以对素材进行缩放,根据旋转角度,可以先对素材进行中心旋转,再计算旋转后图片的位移信息,就可以得到最终映射骨骼关键点位置。将各个素材图片映射到对应的肢体上,便可以达到动作映射的效果。
3.1、具体代码
import osimport cv2import paddlehub as hubimport matplotlib.pyplot as pltfrom matplotlib.image import imreadimport numpy as npdef show_img(img_path, size=8):    '''文件读取图片显示    '''    im = imread(img_path)    plt.figure(figsize=(size, size))    plt.axis("off")    plt.imshow(im)def img_show_bgr(image, size=8):    '''cv读取的图片显示    '''    image = cv2.cvtColor(image, cv2.COLOR_BGR2RGB)    plt.figure(figsize=(size, size))    plt.imshow(image)    plt.axis("off")    plt.show()pose_estimation = hub.Module(name="human_pose_estimation_resnet50_mpii")def get_true_angel(value):    '''    转转得到角度值    '''    return value / np.pi * 180def get_angle(x1, y1, x2, y2):    '''    计算旋转角度    '''    dx = abs(x1 - x2)    dy = abs(y1 - y2)    result_angele = 0    if x1 == x2:if y1 > y2:    result_angele = 180    else:if y1 != y2:    the_angle = int(get_true_angel(np.arctan(dx / dy)))if x1  x2:    if y1 > y2: result_angele = -(180 - the_angle)    elif y1  y2: result_angele = -the_angle    elif y1 == y2: result_angele = -90elif x1 > x2:    if y1 > y2: result_angele = 180 - the_angle    elif y1  y2: result_angele = the_angle    elif y1 == y2: result_angele = 90    if result_angele  0:result_angele = 360 + result_angele    return result_angeledef rotate_bound(image, angle, key_point_y):    '''    旋转图像,并取得关节点偏移量    '''    # 获取图像的尺寸    (h, w) = image.shape[:2]    # 旋转中心    (cx, cy) = (w / 2, h / 2)    # 关键点必须在中心的y轴上    (kx, ky) = cx, key_point_y    d = abs(ky - cy)    # 设置旋转矩阵    M = cv2.getRotationMatrix2D((cx, cy), -angle, 1.0)    cos = np.abs(M[0, 0])    sin = np.abs(M[0, 1])    # 计算图像旋转后的新边界    nW = int((h * sin) + (w * cos))    nH = int((h * cos) + (w * sin))    # 计算旋转后的相对位移    move_x = nW / 2 + np.sin(angle / 180 * np.pi) * d    move_y = nH / 2 - np.cos(angle / 180 * np.pi) * d    # 调整旋转矩阵的移动距离(t_{x}, t_{y})    M[0, 2] += (nW / 2) - cx    M[1, 2] += (nH / 2) - cy    return cv2.warpAffine(image, M, (nW, nH)), int(move_x), int(move_y)def get_distences(x1, y1, x2, y2):    return ((x1 - x2) ** 2 + (y1 - y2) ** 2) ** 0.5def append_img_by_sk_points(img, append_img_path, key_point_y, first_point, second_point, append_img_reset_width=None, append_img_max_height_rate=1, middle_flip=False, append_img_max_height=None):    '''    将需要添加的肢体图片进行缩放    '''    append_image = cv2.imdecode(np.fromfile(append_img_path, dtype=np.uint8), cv2.IMREAD_UNCHANGED)    # 根据长度进行缩放    sk_height = int(get_distences(first_point[0], first_point[1], second_point[0], second_point[1]) * append_img_max_height_rate)    # 缩放制约    if append_img_max_height:sk_height = min(sk_height, append_img_max_height)    sk_width = int(sk_height / append_image.shape[0] * append_image.shape[1]) if append_img_reset_width is None else int(append_img_reset_width)    if sk_width  0:sk_width = 1    if sk_height  0:sk_height = 1    # 关键点映射    key_point_y_new = int(key_point_y / append_image.shape来源:Simply myself
                                                        声明:本站部分文章及图片转载于互联网,内容版权归原作者所有,如本站任何资料有侵权请您尽早请联系jinwei@zod.com.cn进行处理,非常感谢!