本次实验简单实现用nagios监控linux主机和windows主机:
nagios包括2部分:nagios core和nagios-plugins;
nagios core:核心部分不做任何监控工作,仅是处理nagios-plugins信息;
nagios-plugins:主要负责与各被监控端主机通信;
被监控端:通过nagos各种插件来监控数据,并返回给主控端上的nagios-plugins;
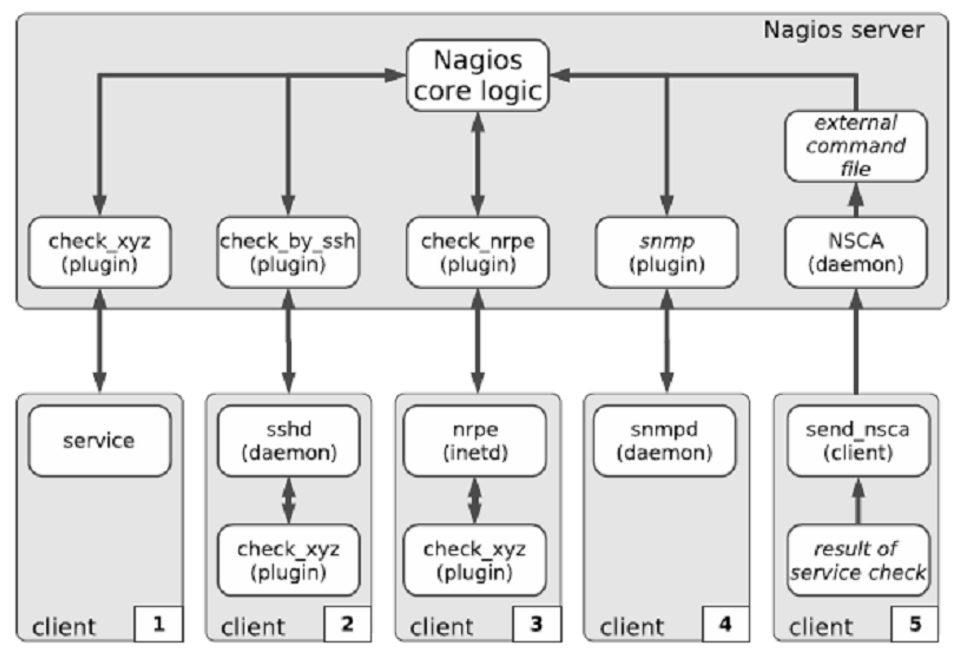
nagios监控配置实现的简单原理介绍:
nagios主控端,需要远程主机的监控机制实现;通过各种插件监控:
在远程主机运行sshd进程,能接受主控端插件发送来的命令并执行,把执行结果返回给主控端插件,插件把获得的结果进行分析,主控插件把分析结果返回给nagios 核心,核心决定是否对分析结果报警;
nrpe专门用来监控linux或unix主机使用的服务(插件);用来在监控linux/unix主机上执行脚本插件以实现对这些主机资源的监控;需要在远程主机安装nrpe服务(inetd),且nrpe也需要安装nagios的各种插件,这些插件在远程主机运行监控,把监控结果通过nrpe返回给主控端插件,后续过程同理;
nrpe依赖于nagios-plugins;
远程主机上安装snmpd服务,只需在远程主机上每隔一段时间运行snmp命令,主控插件联系到远程主机的snmpd服务进程161端口获取监控数据,后续过程同理;
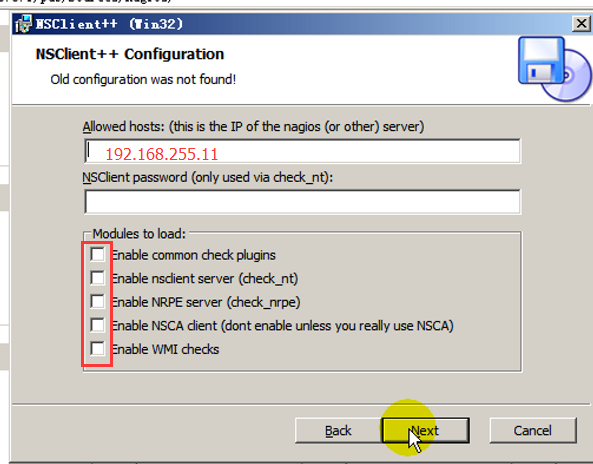
nsclient++:
用来监控windows主机时安装在windows主机上的组件;是windows上wmi组件,获取windows监控数据,返回给主控插件;后续过程同理;

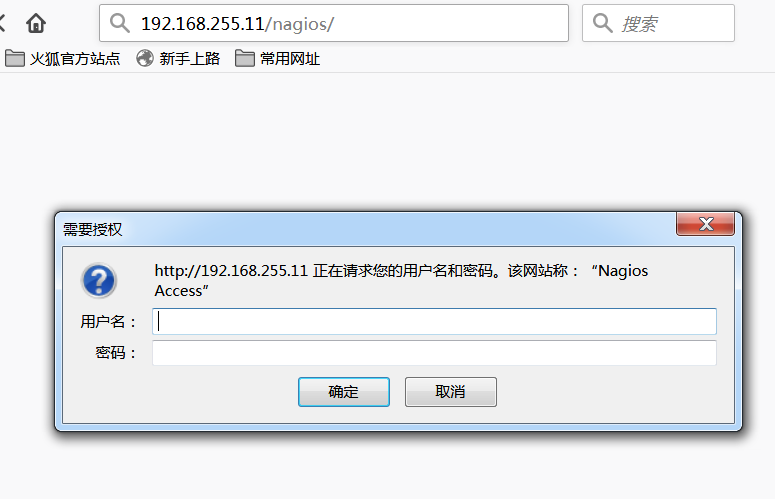
输入此前设置的用户名和密码即可看见登录:
最后完成时,选择立即启动:
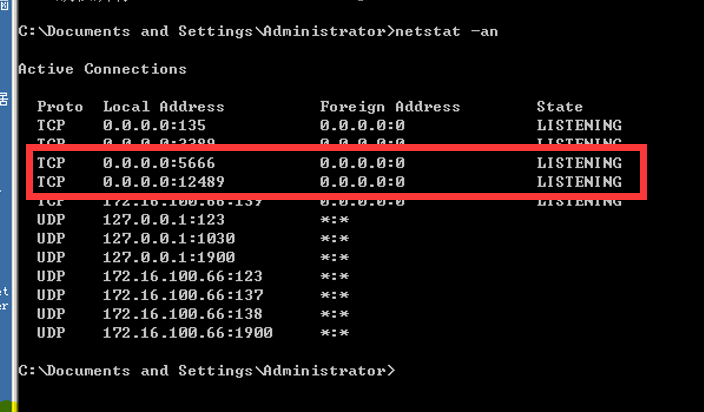
3、在nagios主控端手动测试监控:
]# /usr/local/nagios/libexec/check_nt -H 192.168.255.107 -v UPTIME -p 12489

使用配置文件监控windows远程主机:
在nagios主控端:
4、配置commands.conf文件:
define command{
command_name check_nt
command_line $$USER1$/check_nt -H $HOSTADDRESS$ -p 12489 -v $ARG1$ $ARG2$
}
5、配置windows.cfg文件:
define host{
use windows-server host_name winhost alias My Windows host
address 192.168.255.107
}
define service{
use generic-service
host_name winhost
service_description NSClient++ Version
check_command check_nt!CLIENTVERSION
}
define service{
use generic-service
host_name winhost
service_description Uptime
check_command check_nt!UPTIME
}
define service{
use generic-service
host_name winhost
service_description CPU Load
check_command check_nt!CPULOAD!-l 5,80,90
}
define service{
use generic-service
host_name winhost
service_description Memory Usage
check_command check_nt!MEMUSE!-w 80 -c 90
}
define service{
use generic-service
host_name winhost
service_description C: Drive Space
check_command check_nt!USEDDISKSPACE!-l c -w 80 -c 90
}
define service{
use generic-service
host_name winhost
service_description W3SVC
check_command check_nt!SERVICESTATE!-d SHOWALL -l W3SVC
}
define service{
use generic-service
host_name winhost
service_description Explorer
check_command check_nt!PROCSTATE!-d SHOWALL -l Explorer.exe
}
6、编辑nagios.cfg配置文件中启用windows.cfg
cfg_file=/usr/local/nagios/etc/objects/windows.cfg
7、检查语法:
]# bin/nagios -v etc/nagios.cfg
8、重启nagios服务:
]# systemctl restart nagios
9、打开浏览器:
http://192.168.255.11/nagios/
即可看到有winhost主机了;
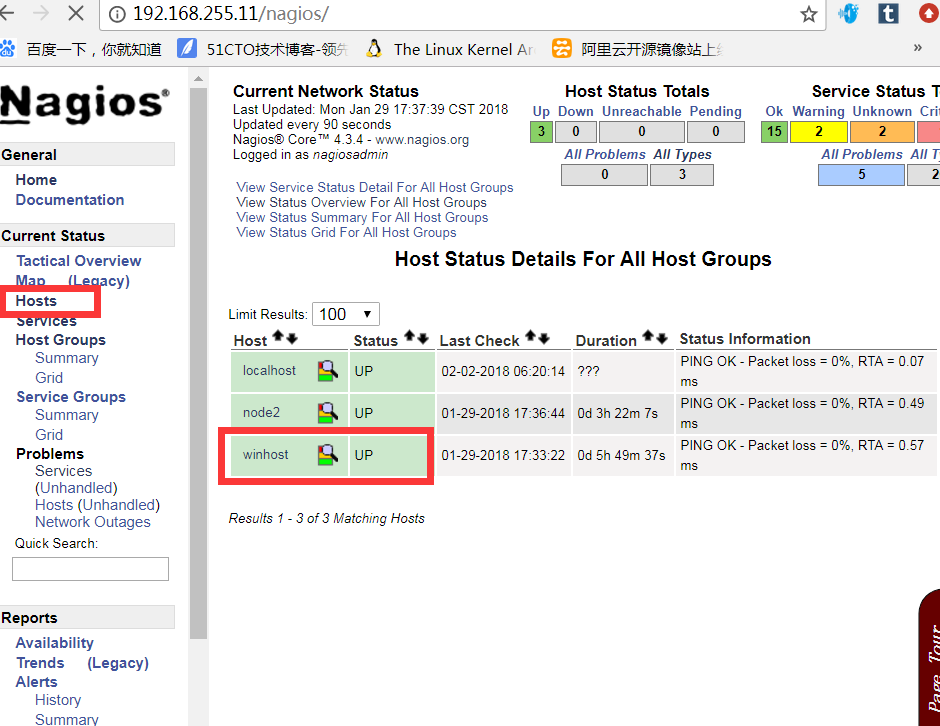
以上步骤完成了简单监控远程windows主机;
下面演示基于nrpe监控远程linux主机:
在远程主机centos7上:
1、添加nagios用户:
]# useradd -s /sbin/nologin nagios
2、nrpe依赖于nagios-plugins安装:
]# tar zxf ngioas-plugins.1.4.15.tar.gz
]# cd nagios-plugins-1.4.15
]# ./confguire –with-nagios-user=nagios –with-nagios-group=nagios
]# make all
]# make install
3、安装nrpe:
]# tar zxf nrpe-2.12.tar.gz
]# cd nrpe-2.12
]# ./configure –with-nrpe-user=nagios –with-nrpe-group=nagios –with-nagios-user=nagios –with-nagios-group=nagios –enable-command-agrs –enable-ssl
]# make all
]# make install-plugin
]# make install-daemon
]# make instal-daemon-config
4、配置nrpe.cfg:
log_facility=daemon
debug=0
pid_file=/usr/local/nagios/var/nrpe.pid
server_port=5666
nrpe_user=nagios
nrpe_group=nagios
allowed_hosts=192.168.255.11
dont_blame_nrpe=0
allow_bash_command_substitution=0
command_timeout=60
connection_timeout=300
command[check_load]=/usr/local/nagios/libexec/check_load -w 15,10,5, -c 30,25,20
command[check_mem]=/usr/local/nagios/libexec/check_memory.pl -w 10% -c 3%
command[check_disk]=/usr/local/nagios/libexec/check_disk -w 15% -c 7% -p /
command[check_swap]=/usr/local/nagios/libexec/check_swap -w 20% -c 10%
command[check_iostat]=/usr/local/nagios/libexec/check_iostat -w 6 -c 10
5、启动nrpe:
]# /usr/local/nagios/bin/nrpe -c /usr/local/nagos/etc/nrpe.cfg -d
来源:weixin_34261415
声明:本站部分文章及图片转载于互联网,内容版权归原作者所有,如本站任何资料有侵权请您尽早请联系jinwei@zod.com.cn进行处理,非常感谢!